
3 Perfectly Easy Ways to Share Your Pencil Lettering Photos When You Have No Time for Perfection

I’ve been drawn to drawing lettering with pencil the past few weeks.
Did you see what I did there? “Drawn to drawing with pencil…” Nevermind.
We started our hybrid model at school recently. Since then, I’ve had to amp up some of my content for students so that I can still practice some form of social distancing and they can still receive instruction. But, while I have been lettering more for demos, that has left me with slightly less time for experimentation with materials I still want to explore. Slightly.
It’s not a bad thing. In a hybrid model, we still have students who are at home and learning online with few materials at hand. So demos using just paper and pencil are less intimidating for them and they don’t feel left out of anything. That’s important. Plus, have you seen Martina Flor’s, Ken Barber’s, or Ivan Castro’s pencil lettering? Forgetaboutit.
In the meantime, I have been thoroughly enjoying the simplicity of pencil and using it on almost everything. But sharing it is not always so simple.
Most of the time, I share my pencil lettering with photos and mockups…which, for me, takes a bit of doing with graphite…Pencil is made of a substance called graphite, which has a shiny, slick quality about it when it’s built up on paper. It’s beautiful in person. But when I’m taking a quick snap with my phone to post later, it’s annoying. There are ways, but it can still be difficult to get a decently lit photo of a pencil drawing where you’re not losing whole parts of your drawing. Either I’m going to spend the time making sure conditions are the absolute best (not always an option), or I’m going to snap and go fix it later. Here are my solutions.
3 Ways to Share Your Pencil Lettering

Sometimes, mockup or not, I’ll just leave it alone, like in the photo above. The shine to me is authentic anyways. If it’s not on an important part of the piece and it’s still readable, I’ll let it go. I probably have a class in 5 minutes.
But, if time allows and the contrast is great enough, I’ll strip out the background color and use the drawing only over a mockup (like the drawing in my last post).
As a last resort, if the contrast is not great enough, I may have to redraw certain sections like in the photo of the planner below. Take a look at the original photo versus the before. You can see the layers where I adjusted it below them.


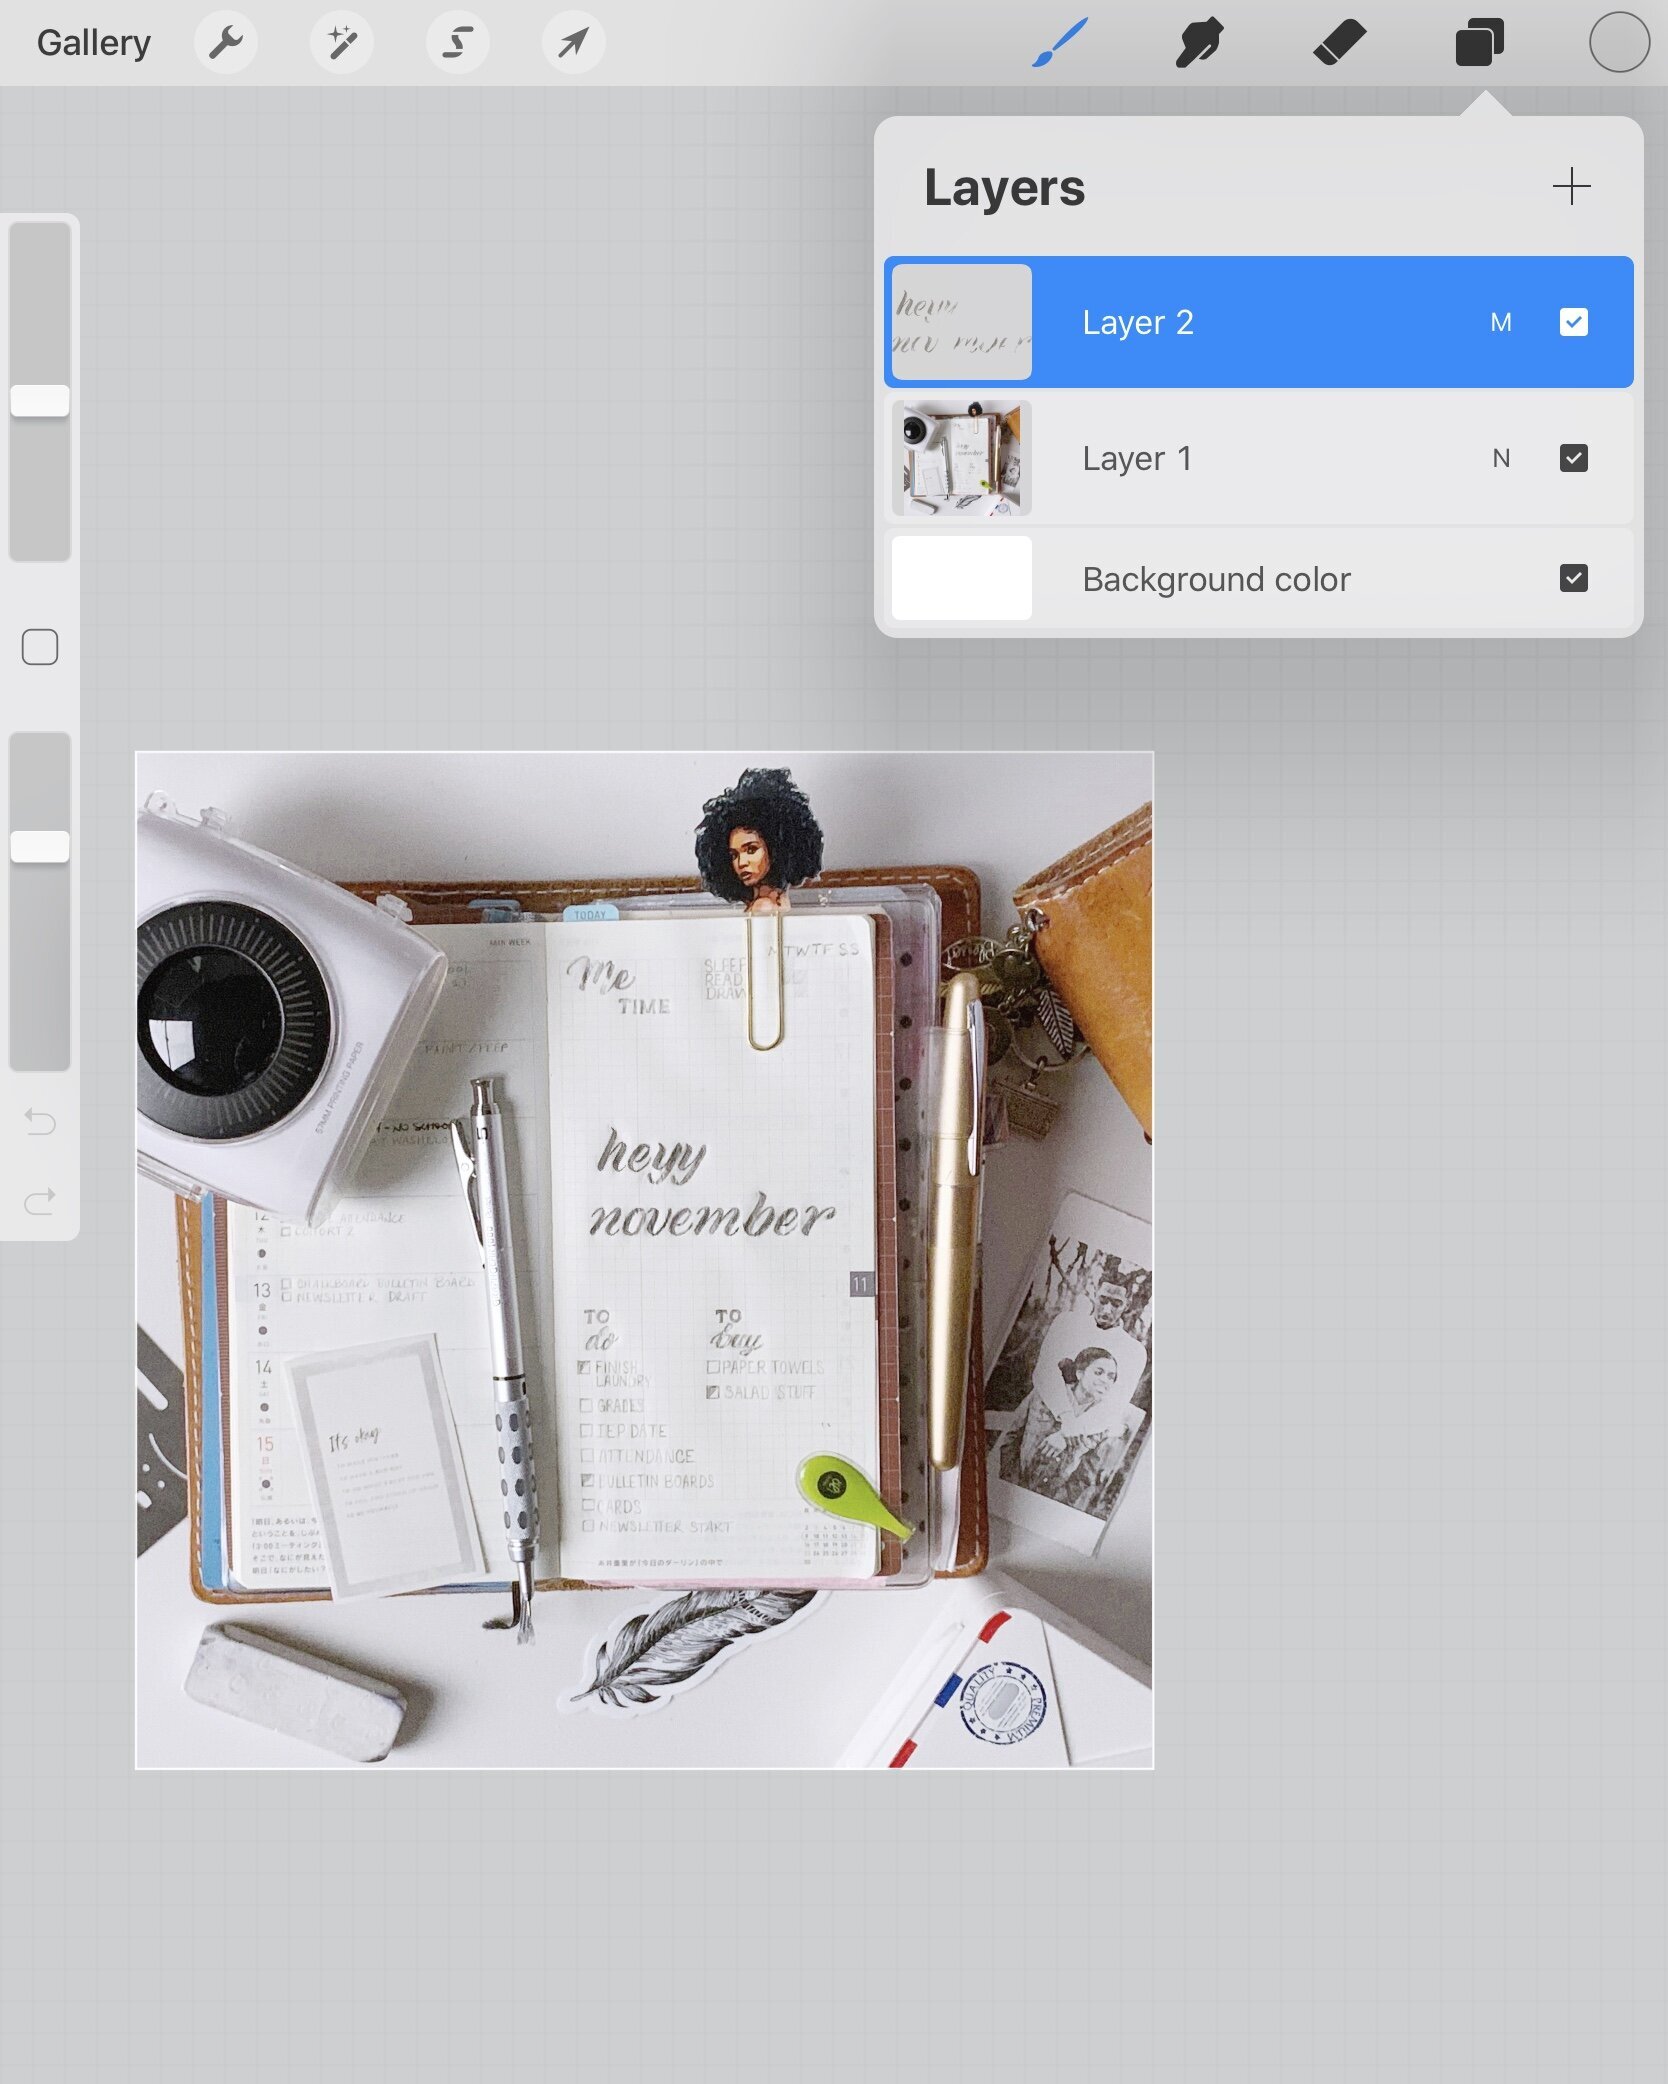
I use Procreate often and this kind of trickery requires I use some Procreate brushes that mimic pencil really well. Procreate comes with its own pencils that I love (HB and 6B). But, the Tight Pencil Sketch brush by Scotty Russell and the Sketching & Lettering brush set by Cynthia Lopez of CynlopInk are two additions I can’t live without.
Until I find out how Ken Barber does it so well and do it between classes, these are my go-to methods, er, on-the-go.
Do you do any lettering with pencil? How do you photograph yours?
